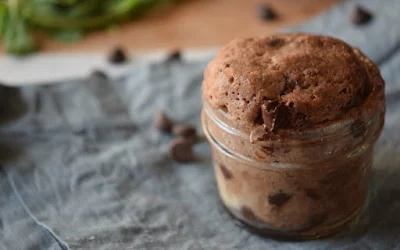
5 Steps to Baking a Mason Jar Cake
A few steps and you can turn your favorite cake recipe into a gift. Also, fun to serve to your family or guest.
Whether you’re getting creative with mini cakes for a party or preparing festive food gifts for friends and family, it doesn’t get much cuter than a mason jar cake. Some mason jar cakes are made from premade cakes, like cut up cupcakes, and assembled in layers with frosting inside. Our favorite jar cakes are actually baked right in the canning jar for the perfect fit, and it’s easier than you might think. Flexible enough to work with nearly any of your favorite cake recipes, it just takes five simple steps to go from ingredients to giftable baked goods.
1. Start with 6 clean, one-pint canning jars for one two-layer cake recipe. Cover the inside of each jar with spray oil and line on a baking sheet for support. If you’re recycling old jars, use new lids and seals for baking.
2. Preheat the Oven and Make the Batter
Preheat the oven and mix together the ingredients according to your cake recipe instructions.
3. Scoop and Bake
Add batter to the one cup mark on each jar using a ¼ cup scoop, about halfway up the jar if it’s a standard size canning jar. Clean off any batter that sticks to the side. Bake for 15 minutes less than the time allotted in your recipe. Consider rotating your baking sheet halfway through baking to ensure even cakes. Check for doneness and adjust time if needed.
4. Frost and Close
If you’re frosting the cakes, let your jars cool before frosting. If you’re not frosting your cakes, consider an airtight seal for your jars to keep the cakes fresh. To do this, the jars must still be warm, and the lids should be room temperature. Cap the jars, but not too tight. After 15-20 minutes, a popping noise will indicate the heat from the jars have created a vacuum for an airtight seal.
5. Decorate
Jazz up your jars to create the ultimate gift that works with any theme. Write the name of your cake on a gift tag and string it to your jars using ribbon or twine.


No comments:
Post a Comment
Always love to hear from you...have a sweet day.